Archive
Rhino Sketch
Using a pencil then black pen and a photo from the Net as a reference and after almost 25min I finished this Rhino.
Follow me on Twitter @h_ta3kees

Digital Sketch: Elephant
Some time I even don’t care to use any special application to do a fast rough sketch, here I am using my galaxy Note 9 and the print-screen (or copy screen) mode to do this fast sketch of an Elephant.
Follow me on Twitter @h_ta3kees

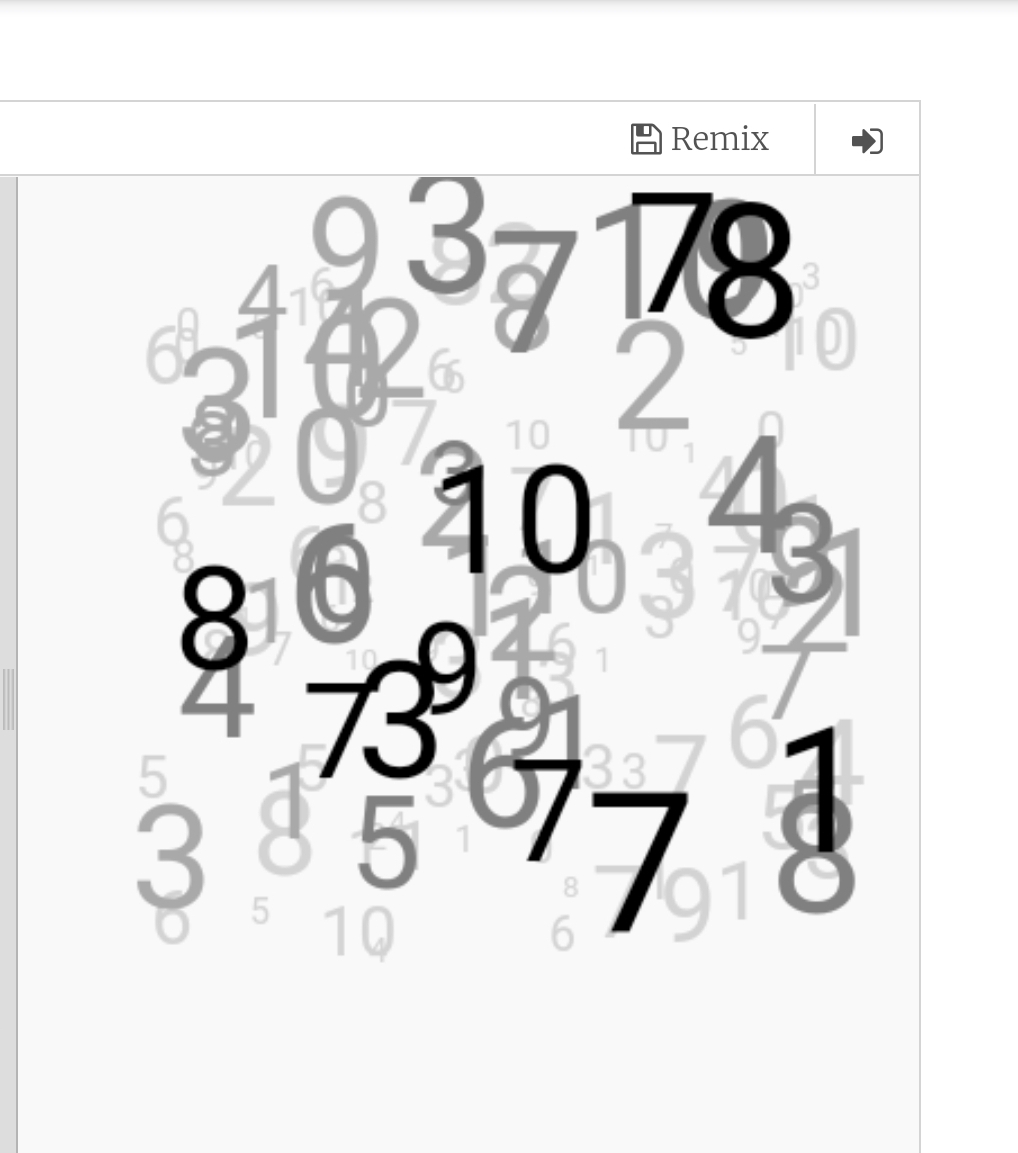
Python Project: Drawing Cloud Number
Learning : Python, Drawing
Subject: Using Python to Draw Cloud Number
In this project we will write a code to draw a cloud of number, we will do this as layers each layer with different font size and different color density.
To do this we will write a function def draw_cloud(tcolor,max_r,sr,lr) : to fill the screen with max_r random numbers from sr to lr (small range, large ramge) using tcolor color. We will recall the function several time each time we will change the tcolor,max_r,sr,lr. Here is the code ..
The Code |
|
Example with Gray theme |
|
Another Example with Pink theme. |

By: Ali Radwani
Flowers in my lens.. 4
Here is another photo sample taken with #galaxy #Note9 phone for some flowers in my garden..
For mor follow me on Twitter @h_ta3kees

Activities in Pandemic
During COVID19 school vacation I had several activities with my kids specially Drawing and Coloring, here are some papers that we colored along with Turkish Coffee (coffee for me). I take the photo using Galaxy Note 9.

Another sketch challenge: Red Pandas
This week sketch challenge @1hour1sketch is to Draw a Red Pandas or Racoon Fox, so here is my sketch using pencil, black Pen and watercolour.
I am sure I can’t do better than this, I need more practice in using white color and fur drawing / painting
More Sketches on my Sketch page ..
also follow me on Twitter @h_ta3kees

Python: My Orders Tracker P-4
Learning : Pythn, sqlite, Database, SQL
Subject: Create a system to track the orders
In this last part we will write the code to Edit an Order, in editing an order function first we will show all orders and will ask the user to select the one to be EDIT, then we will display that order detail on the screen and ask the user to confirm the action by entering ‘Y’ [our code will handel both y and Y]. We will ask the user about each attribute in the Order details if it need to be change or [Just press Enter to Keep the Current Data], also if the user enter ‘e’ or ‘E’ we will exit from the Editing mode.
Here is the code ..
# Function to Edit an Order

def edit_order():
    os.system('clear')
    print("\n==========[ Edit Orders ]==========")

    show_order('yes')

    edit_order = input('   Select the Order ID to be Edited. [E to Exit] > ')

    if edit_order in ['e','E'] :
        return
    elif not edit_order.isnumeric() :
        input('\n   You need to enter an Order''s ID [Numeric]. .. Press any Key .. ')
        return

    try:

        c.execute ("select * from orders where o_id ={}".format(edit_order))
        order_list = c.fetchone()

        if order_list == [] :
            input('\n   ID {} Not Exsist. .. Press any key to continue.  '.format(edit_order))
            return

        os.system('clear')
        print("\n==========[ Edit Orders ]==========\n")
        print('\n   Details of the Order you select:\n ')

        print(" "*15,"ID: ",order_list[0])
        print(" "*13,"Date: ",order_list[1])
        print(" "*5,"Order Number: ",order_list[2])
        print(" "*12,"Price: ",order_list[4])
        print(" "*9,"Quantity: ",order_list[5])
        print(" "*3,"Shipment Price: ",order_list[6])
        print(" "*7,"Total Cost:  {:.2f}".format((order_list[4]*order_list[5]) + order_list[6]))
        print(" "*6,"Description: ",order_list[3])
        print(" "*12,"Image:",order_list[8])
        print(" "*13,"Link:",order_list[7])

        user_confirm = input("\n\n   You Select to EDIT the above Order, Enter Y to confirm, E to Exit. > ")
        if user_confirm in ['e','E'] :
            input('\n   You entered ''E'' to Exit. Nothing  will be change. Press any key. ')
            return

        if user_confirm in ['y','Y'] :
            #To Edit the order..

            print("#"*57)
            print("##"," "*51,"##")
            print("##   NOTE: Enter E any time to EXIT/Quit."," "*12,"##")
            print("##     OR  JUST Press Enter to keep the Current data."," ##")
            print("##"," "*51,"##")
            print("#"*57,)

            while True :

                new_date = input (f'\n   The current date is: {order_list[1]}, Enter the New date as[dd-mm-yyyy] > ')

                if e_to_exit(new_date) =='e' : return
                if new_date =="" : break   # Break the while loop if the user want to keep the current Date.

                if date_validation (new_date) == 'valid' :
                    break
                else :
                    print(date_validation (new_date))


            new_onum = input (f'\n   The current Order Number is: {order_list[2]}, Enter the New Order Number. [E to Exit]. > ')
            if e_to_exit(new_onum) =='e' : return

            new_qunt = input (f'\n   The current Quantity is: {order_list[5]}, Enter the New Quantity. [E to Exit]. > ')
            if e_to_exit(new_qunt) =='e' : return

            new_price = input (f'\n   The current Price is: {order_list[4]}, Enter the New Price. [E to Exit]. > ')
            if e_to_exit(new_price) =='e' : return

            new_ship_price = input (f'\n   The current shipment Price is: {order_list[6]}, Enter the New Quantity. [E to Exit]. > ')
            if e_to_exit(new_ship_price) =='e' : return

            new_link = input (f'\n   The current link is: {order_list[7]}, Enter the New Link. [E to Exit]. > ')
            if e_to_exit(new_link) =='e' : return

            new_image = input (f'\n   The current Image is: {order_list[8]}, Enter the New Image (path). [E to Exit]. > ')
            if e_to_exit(new_image) =='e' : return


            new_desc = input (f'\n   The current Description is:\n     {order_list[3]}.\n\n      Enter the New Description. [E to Exit]. > ')
            if e_to_exit(new_image) =='e' : return


            # Updating the record in the DataBase.
            if new_date > '' and new_date != "e" :
                c.execute("update orders set order_date = '{}' where o_id = {}".format(new_date,int(order_list[0])))
                db_conn.commit()

            if new_onum > '' and new_onum != "e" :
                c.execute("update orders set order_num = '{}' where o_id = {}".format(new_onum,int(order_list[0])))
                db_conn.commit()

            if new_qunt > '' and new_qunt != "e" :
                c.execute("update orders set order_quantity = '{}' where o_id = {}".format(new_qunt,int(order_list[0])))
                db_conn.commit()

            if new_price > '' and new_price != "e" :
                c.execute("update orders set order_price = '{}' where o_id = {}".format(new_price,int(order_list[0])))
                db_conn.commit()

            if new_ship_price > '' and new_ship_price != "e" :
                c.execute("update orders set order_price = '{}' where o_id = {}".format(new_ship_price,int(order_list[0])))
                db_conn.commit()

            if new_link > '' and new_link != "e" :
                c.execute("update orders set order_link = '{}' where o_id = {}".format(new_link,int(order_list[0])))
                db_conn.commit()

            if new_image > '' and new_image != "e" :
                c.execute("update orders set order_img = '{}' where o_id = {}".format(new_image,int(order_list[0])))
                db_conn.commit()

            if new_desc > '' and new_image != "e" :
                new_desc = " ".join([word.capitalize() for word in new_desc.split(" ")])

                c.execute("update orders set order_desc = '{}' where o_id = {}".format(new_desc,int(order_list[0])))
                db_conn.commit()

            input('\n   One record has been EDITED and Saved... \n      ... Press any key to Continue ...')

        else:
            input('\n      Wrong input ... Press any key to continue ..')

    except:
        pass
[All the System Codes available in Download Page.]
Finish: Now we have an application that will store and retrieve our simple order data.
Enhancement: We can do some enhancement in [link and image] data part to show and display them in better way.
| Part 1 | Part 2 | Part 3 | Part 4 |
To Download my Python code (.py) files Click-Here
By: Ali Radwani
Flowers in my lens … 3
Here is a mcro photo sample taken with #galaxy #Note9 phone for some flowers in my garden..
For mor follow me on Twitter @h_ta3kees

Another sketch challenge: The House
This week sketch challenge @1hour1sketch is to Draw a Red House, so here is my sketch using pencil, black Pen and watercolour. More Sketches on my Sketch page .. also follow me on Twitter @h_ta3kees

Python: My Orders Tracker P-3
Learning : Pythn, sqlite, Database, SQL
Subject: Create a system to track the orders
In this part we will write the code to Delete an Order that we have from our system, also we will add some validations on the user input, like if the user enter something not from the menu, or to do so, first we will re-call the show_orders() function that we have and passing the ‘yes’ parameter which means we are calling the function from inside another function [we will not print the function header, and will not clear the screen]. Then we will ask the user to select/Enter the ID of the order to be Deleted, after that we will print tha order details again on the screen and ask the user to confirm Deleting command by entering ‘Y’ … thats it.. let’s write the code..
# Delete Order

def del_order():
    os.system('clear')
    print("\n==========[ Delete Orders ]==========\n")

    show_order('yes')

    del_order = input('   Select the Order ID to be Deleted. [E to Exit] > ')

    if not del_order.isnumeric() :
        input('\n   You need to enter an Orders ID [Numeric]. .. Press any Key .. ')
        return

    elif del_order in ['e','E'] :
        return

    try:
        c.execute ("select * from orders where o_id ={}".format(del_order))
        order_list = c.fetchone()

        if order_list == [] :
            input('\n   ID {} not exsist.'.format(del_order))
            return

        os.system('clear')
        print("\n==========[ Delete Orders ]==========\n")
        print('\n   Details of the Order you select:\n ')

        print("   ID: ",order_list[0])
        print("   Date: ",order_list[1])
        print("   Order Number: ",order_list[2])
        print("   Price: ",order_list[4])
        print("   Quantity: ",order_list[5])
        print("   Shipment Price: ",order_list[6])
        print("   Total Cost: {:.2f}".format((order_list[4]*order_list[5]) + order_list[6]))
        print("\n   Description:",order_list[3])
        print("   Image:",order_list[8])
        print("   Link:",order_list[7])

        user_confirm = input("\n\n   You Select to DELETE the above Order, Enter Y to confirm, E to Exit. > ")
        if user_confirm in ['y','Y'] :
            #To Delete the order..
            c.execute ("delete from orders where o_id ={}".format(int(del_order)))
            db_conn.commit()

            input('\n   One record has been DELETED ... \n      ... Press any key to Continue ...')

        elif user_confirm in ['n','N']:
            input("\n    You select not to DELETE any thing.   Press any key to Continue .. ")

        elif user_confirm in ['e','E']:
            input("\n    You select stop the process and EXIT.    ... Press any key to Continue .. ")
            return

        else:
            input('\n      Wrong input ... Press any key to continue ..')

    except:
        pass
The user select #3 from the menu to Delete an Order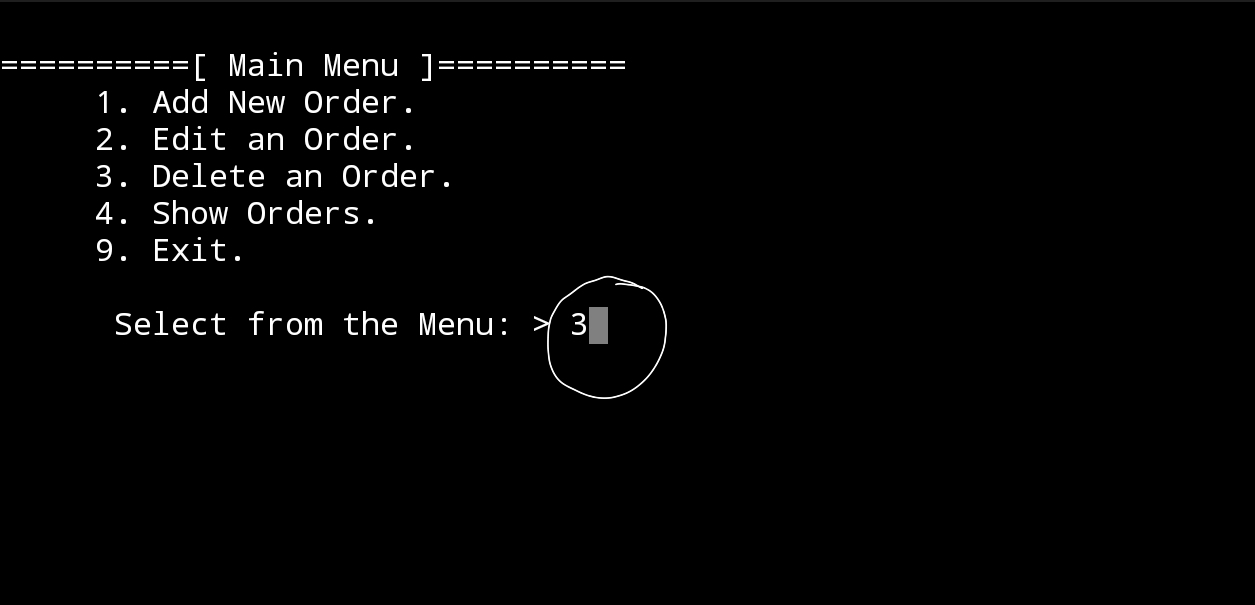 |
The screen display the list of orders we have in the system, and the user select Order ID Number 3 to delete it. |
The screen display the details of the order ID 3 and ask the user to confirm the deleting by entering ‘Y’ |
In Next Post: In the coming post P4 , we will write the codes to Edit an order information.
| Part 1 | Part 2 | Part 3 | Part 4 |
To Download my Python code (.py) files Click-Here
By: Ali Radwani
Taking pictures is not my main daily practices, but when i start playing with my camera, i really enjoy my self.
Thanks for visiting my Space..


