Library System with Excel -P3
Learning :Excel formulas and VBA Cods
Subject: To Develop a Library System with Excel
In last post we wrote all the codes needed to Manage the Classifications.
In this part we will do all the coding needed to enter the Authors and Edit or Delete anyone we select, so first we will go to the “setting” sheet and will write the following: E5:current_author, F5:1, E6:mode, F6: edit as in the image.
 |
Now in the “Data” sheets, we create a table with “Author Name” header on range K2, then enter any Autor name such as “Albert” as in the image.
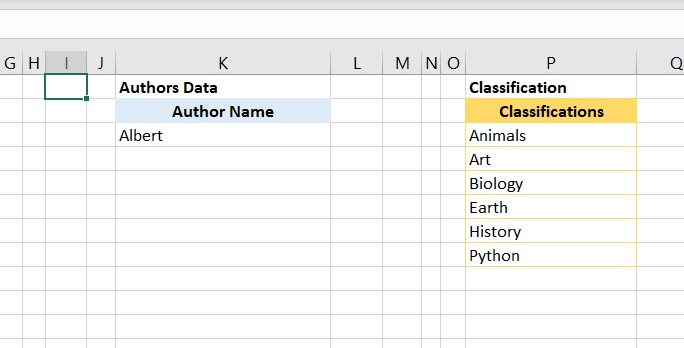 |
Now, we move to “Authors” Sheet and do the following:
1. In Cell B6 write “Select an Author to Edit or Delete”, Color and format it as you want.
2. In Cell H6 write “Authors Form”, Color and format it as you want.
3. Color and format the Range (B6:E19) and the Range (H6:K13) as you want.
4. Create three rectangular shapes as New, Delete, and Save buttons.
5. We need to create a ListBox name it “authors_ListBox1”.
6. Arrange everything as in the image.
 |
CODING:
To copy the list of the Authors we have into the ListBox:
1.1 From the Menu goto Formulas and click on Name Manager
| |
1.2 From the pop-up screen click on New, then write author_list in Name, and =OFFSET(Data!$K$3,,,COUNTA(Data!$K:$K)) in Refers to [as in image]
 |
2.1. Select the ListBox in the Authors sheet.
2.2. Right-click the mouse, and select FormatControl.
2.3. Goto Control Tab, and in Input range write: author_list, and in Cell link write Setting!$F$5 then press OK.
Now the listBox will contain the Authors we have in the Author list in Data Sheep. … [SEE THE IMAGE]
 |
ListBox Code:
Now we will write a three lines of code to take action when we select any things in this box, so select the ListBox, click right-mouse-button, select “Assinge Macro, then the VBA application will start and write the foloing code:
selected_author = Sheets(“Setting”).Range(“F5”).Value + 2
Sheets(“authors”).Range(“j9”).Value = Sheets(“data”).Range(“K” & selected_author)
Sheets(“Setting”).Range(“F6”).Value = “edit”
End Sub
Buttons Codes:
1. While in Authors sheet, select the rectangular shape named “New”, click right-mouse-button, select “Assinge Macro, then the VBA application will start and we will write this code:
Sheets(“authors”).Range(“J9”).ClearContents
Sheets(“Setting”).Range(“F6”).Value = “new”
Sheets(“Authors”).Range(“J9”).Select
End Sub
2. While the VBA application is on, we will write all the codes we need for Edit and Delete buttons and then will assign the macros:
author_delete_Click
If Not Sheets(“setting”).Range(“F5”).Value Then
MsgBox “Nothing selected to be Deleted..”
Exit Sub
End If
answer = MsgBox(“Are you sure you want to DELETE this Author?.”, vbQuestion + vbYesNo)
If answer = vbYes Then
current_select = Sheets(“setting”).Range(“F5”).Value + 2
Sheets(“Data”).Range(“K” & current_select).ClearContents
next_row = Sheets(“Data”).Range(“K” & Rows.Count).End(xlUp).Offset(1).Row
Sheets(“Data”).Range(“K3:K” & next_row – 1).SortSpecial SortMethod:=xlPinYin
authors_ListBox1_Change
MsgBox “One Author has been Deleted..”
Else
MsgBox “OK, Nothing will be changed.”
End If
End Sub
author_save_Click
If Sheets(“authors”).Range(“J9”).Value = Empty Then
MsgBox “There is no Author Name to Save.”
Exit Sub
End If
If Sheets(“Setting”).Range(“F6”).Value = “new” Then
‘ Get next empty row
next_row = Sheets(“Data”).Range(“K” & Rows.Count).End(xlUp).Offset(1).Row
‘ copy the new classification to the data-table
Sheets(“authors”).Range(“j9”) = StrConv(Sheets(“authors”).Range(“J9”), vbProperCase)
Sheets(“Data”).Range(“K” & next_row).Value = Sheets(“Authors”).Range(“J9”)
‘ Empty the form
Sheets(“Authors”).Range(“J9″).ClearContents
MsgBox ” One New Author Name Saved.”
‘ To Sort the classifications
next_row = Sheets(“Data”).Range(“K” & Rows.Count).End(xlUp).Offset(1).Row
Sheets(“Data”).Range(“K3:K” & next_row – 1).SortSpecial SortMethod:=xlPinYin
authors_ListBox1_Change
Exit Sub
End If
If Sheets(“setting”).Range(“F6”).Value = “edit” Then
selected_author = Sheets(“Setting”).Range(“F5”).Value + 2
Sheets(“authors”).Range(“J9”) = StrConv(Sheets(“authors”).Range(“J9”), vbProperCase)
Sheets(“data”).Range(“K” & selected_author) = Sheets(“authors”).Range(“J9″).Value
MsgBox ” One Author Name Changed.”
‘ Sort the Authors Name
next_row = Sheets(“Data”).Range(“K” & Rows.Count).End(xlUp).Offset(1).Row
Sheets(“Data”).Range(“K3:K” & next_row).SortSpecial SortMethod:=xlPinYin
authors_ListBox1_Change
Exit Sub
End If
End Sub
In the Save code we re-sort the data in the ListBox. Here is a part of the code we use to do so:
‘ Sort the Authors Name
next_row = Sheets(“Data”).Range(“K” & Rows.Count).End(xlUp).Offset(1).Row
Sheets(“Data”).Range(“K3:K” & next_row).SortSpecial SortMethod:=xlPinYin
authors_ListBox1_Change
New we can assign the macros we just creates to the buttons we have (Delete and Save).
End of Part-3
Recap this part:
1. We Create an Author list.
2. We Create a form to collect the Author from the user.
3. We Create the Author ListBox.
4. We wrote the VBA code to Save, Delete, and Create New Author also to retrieve the Author into Author ListBox.
:: Library System with Excel ::
| Part 1 | Part 2 | Part 3 | Part 4 | Part 5 |
To Download EXCEL (.xlsm) files Click-Here
 Follow me on Twitter..
By: Ali Radwani
-
November 17, 2020 at 8:16 amLibrary System with Excel -P2 | Ali's Photography Space...
-
November 24, 2020 at 9:05 amLibrary System with Excel -P4 | Ali's Photography Space...
Taking pictures is not my main daily practices, but when i start playing with my camera, i really enjoy my self.
Thanks for visiting my Space..


