ARDUINO: 2Pin Push Button and Speed Delay
Learning : Arduino, Circuit, coding
Subject: Controlling LED Delay by Push-Button
[NOTE: We are working on Electronic Devices, Voltage, Resistors and other Electronic Parts that may Become HOT due to un-stable current or Wrong Wire Connections.. PLEASE BE CAUTIOUS AND TAKE SAFETY NEEDED PROCEDURES.]
In many ARDUINO Project we codes that have Delay commands, such as in LED Blinking circuits. The delay use numbers, 1000mSec is 1sec, Example in LED blinking projects there must be a delay for some time [1000mSec is 1Sec] between LED-Hight and LED-Low commands. Usually we use a variable to save a delay amount, we can change the amount during code run-time if certain condition accurred.
In this post, we will learn how we can use a 2Pin Push Button to control the speed/Delay of a blinking LED using a code when the Button pressed.
The Case: Say we have a one LED that’s blinks (turns On and Off) with Delay time = 800 (mSec), we want to Press the Button to make it Blink Faseter, and each time we Press it blinks faster and faster, say each press will reduce the amount by 100mSec unit, and if the delay reach less than 60mSec, then it will jump to 800mSec again.
What we Need:
- Arduino UNO or Arduino Nano.
- 1 Breadbord.
- 1 LED. [i will use a red one]
- 1 2Pin Push Button.
- 1 Resistor 300 ohm.
- Some Jumper wires.
Connections:
- Connect Pin-1 in PushButton to ARDUINO Pin 8.
- Connect Pin-2 in PushButton to ARDUINO Pin 5V.
- Connect ARDUINO Pin-13 to a resistor Pin-1.
- Connect the LED Anode(+) Pin to the Resistor Pin-2.
- Connect the LED Cathode(-) Pin to ARDUINO GND Pin
You will have something like this ..
 |
Code Consept:
The LED will start blinking in 800msec (start_delay), then we want to press the Push Button and with each press the delay must decreases by certain amount (delay_reduce_s_1 = 100mSec), then if the delay time is less than 100mSec the decrease amount will be as (delay_reduce_s_2 = 10mSec) with each press, also if the delay is below min_delay = 60mSec the delay we re-set to start_delay.
Run-Time:
The LED will start blinking in 800mSec, then we Press the Push-Button (First Press) the delay will be 700mSec, and with each Pressed the delay will decreases 100mSec, when the delay reach less than 100mSec [from 800mSec to 100mSec after 8 presses] then it will start to reduces 10mSec with each Press. If the current delay is less than min_delay it will reset to 800mSec again.
GIF speeded-up to save space.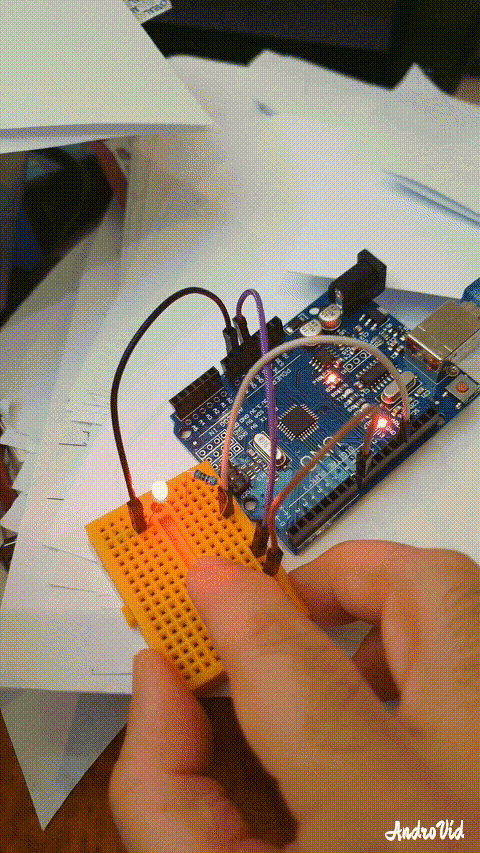 |
:: ARDUINO PROJECTS LIST ::
[ Click Here to See all ARDUINO Projects ]
To Download the ARDUINO Project [Code and Diagram] files Click-Here
 Follow me on Twitter..
By: Ali Radwani
Taking pictures is not my main daily practices, but when i start playing with my camera, i really enjoy my self.
Thanks for visiting my Space..


