Archive
Another Sample for the Green Preset..
Some time you may want to add more Green colors to your photos, here is a LightRoom 2 preset file that i create to do this and you can see the sample shot on the left the Yellow rose without the Green Preset filter and on the right is the same shot after applying the filter..[Click the image to enlarge]
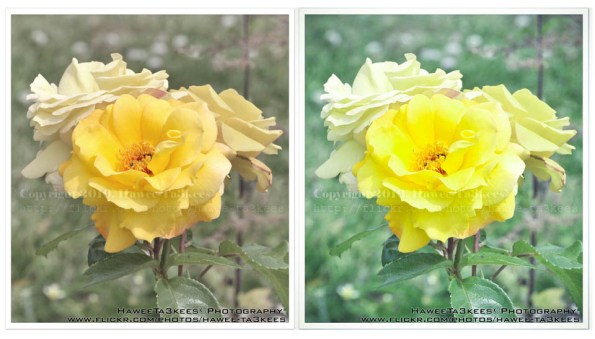
you can download this preset from The Download Section..
Three colored Bottles..
This is one of the Water drops from bottle project results, i edit the photo in the photoshop to colored the red water into blue and mauve.
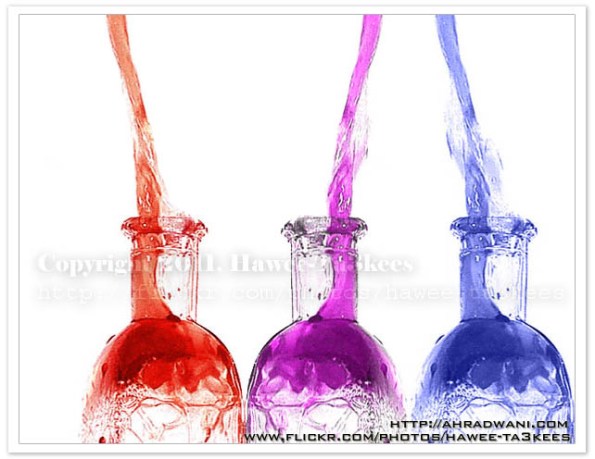
Water drops from bottle..
How to shot the water while it drops out from the bottle?
In this project we need to setup a studio to be ready with the following:
[Click the image to enlarge]

Here i am listing the equipment that a used in this project, you may have better studio than this..:)
o} A Bottle.
o} Food colors.
o} Light.
o} Monopod.
o} Tripod. [80cm from the bottle]
o} White Paper as a background.
o} Hanger. [to hang the bottle up side down]
o} I used the Nikon D90 + Nikon 35mm lens with shutter release cable.
1. Fill the bottle with a colored water and hang it upside down try to close the bottle hole with your hand. [Click the image to enlarge]


2. Start shooting [use the release cable] and remove your hand and let the water comes out from the bottle.
I come up with almost 200 shots here are some samples..
[Click the image to enlarge]


I just start to play with the photos in Photoshop and LightRoom here is one image and other will be post later..[Click the image to enlarge]

Another Sample for the Green Preset
This is on of my photos from London2010 Collection the first photo is the original one without any edits.
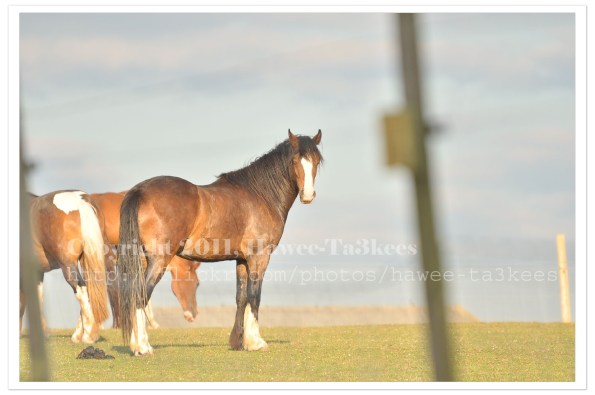
I used Nikon D90 with this setting:
Exposure: 0.002 sec (1/500)
Aperture: f/5.6
Focal Length: 300 mm [Nikon 70-300mm]
ISO Speed: 400
Exposure Bias: 0 EV
Flash: No Flash
And this is the same photo after been edited in Photoshop & Adobe Lightroom 2, I apply one of my preset files “More Green Color” and you may download it from My Download Section.
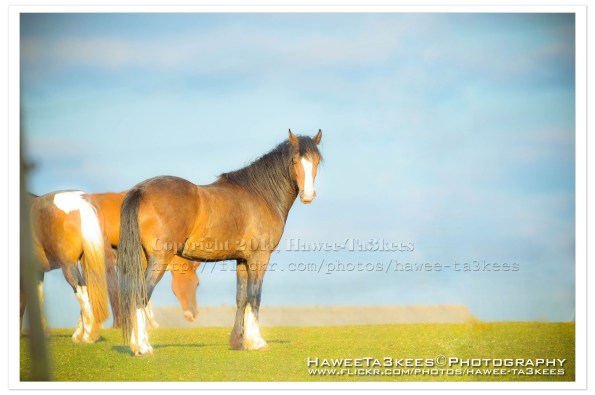
Adobe LightRoom 2 Preset file name: ahradwani More Green.rar
Click here to Download the File.
LightRoom2 preset … More Green
Some time you may want to add more Green colors to the trees in your photos, here is a LightRoom 2 preset file to do this and you can see the sample shot to..you can download this preset from The download section..
A screen shot of the lightroom 2

[Click the image to enlarge]
Another shot Before & After..
After … [Click the image to enlarge]
Adobe Lightroom2 Before & After
Here is another preset file you can download from the download section.This preset will add more colors to your photo and from there you can adjust it as your need.
File Name: ahradwani_MoreColorTemp [lrtemplate]
Click the image to see the Before & After photos in the LightRoom.
Click the file name to download it, or navigate to the Download Section to see more preset files.
Sun Eclipse Lens cover … Create One..
How to create a sun eclipse cover for the camera lens you have?
What do you need?
* Cardboard – any color.
* A4 paper or any paper that can be twisted around the lens.
* Camera Film.
* Tape (Masking/Duct Tape)
* The lens that you want to use. (I prepare two covers for my Nikon 70-300mm, and Sigma 50-500mm)
Assemble it..
* Put the lens on the card board and draw a circle around the lens.
* Draw a rectangle in the middle of the circle and cut it out,
The cutting area must be smaller than the film width/height.

The RED rectangular is the Film size, you have to cut the GRAY (Smaller) rectangular
[Click the image to enlarge]
* Fix the film on the card,

for now, you have the cardboard and the Film taped on it you need another one step to start shooting the sun in the mid of day.
[Click the image to enlarge]
* Make a Cylinder of the A4 and use the tape to fix it.
* Place the Card inside the Cylinder (on the top of one side – left 1cm) and use the tape to fix it.


Now you have this, and it’s complete, just fix it on the top of the lens and shot the sun.
[Click the image to enlarge]
Final result… the cover for the Nikon 70-300mm

[Click the image to enlarge]
Done …
Here is a shots for the sun and it was great to see the small black spot on the sun! i don’t know what is it but it’s there you can see it, too make sure it is not a dust on my lens; i move the camera to the right and left but the spot dose’t move which mean it it not on the camera it is something on the sun or close to it it may be a planet… Have Fun

[Click the image to enlarge]
The Camera Setting
Exposure Time = 1/1250″
F Number = F13
Exposure Program = Manual
Date Time Original = 2011-06-20 16:02:48
Exposure Bias Value = +5EV
Focal Length = 1000mm
Photo Frame by Photoshop Action..#6
In this Action the file MUST be resized to 2500W, the image will be Divided to three parts, the up & down are black with Fill 59%, Opacity 80% and white border. .
Name: Wide Double Black.
Download: Download the File from the Photoshop Actions in my “Download Section“
Result: [Click the image to enlarge]

My New iPhone 4, a stupid lock phone!!

I purchased this iPhone 4 from the internet (amazon.com) there was nothing saying that it’s lock to AT&T and can’t be used out side USA (I wonder where is the customer rights to select a carrier), once i received it i notes that it will not work on Qatar, i am waiting for the unlock solution for OS 4.2.1 BB 3.10.01… No thing till now. For now all i can do is jailbreak it and hope the unlock will be soon released..
Photo Frame by Photoshop Action..#5
In this Action the file will be resized to 2500W, 0.5cm border will be selected and copied to new layer with multiply blinding mode finally white border the image will resized (about 0.5cm), New layer will be Created with two rectangular one as out border and the second is just bigger than the image.
Name: Simple Dark.
Download: Download the File from the Photoshop Actions in my “Download Section“
Result: [Click the image to enlarge]

Instruction:
– Un-ZIP the file.
– Copy the file to this folder :[Your Drive] .. Program Files\Adobe\Photoshop 7.0\Presets\Photoshop Actions
– Open the Photoshop (this sample is for Photoshop 7.0)
– Your image must NOT BE on the background Layer, copy it to new layer first.
For How to open an action file in Photoshop Click Here..


